
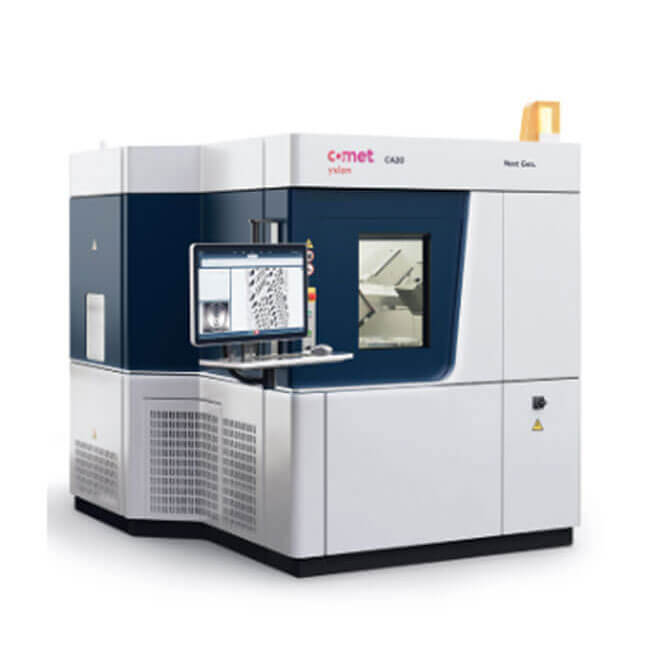
Yxlon CA20 3D SMT X-ray Inspection Machine
Now available as a fully-automated inspection solution for Advanced Packaging, the CA20 is designed to deliver superior 2D & 3D images in the highest resolution. It allows the fastest inspection of micron-sized details, identifying structural defects fast – and helps cut time to market for complex 3D ICs.
Highlights
Designed for the semiconductor industry
Available with fully automated operation for seamless integration into your fab
AI-based data analysis and advanced software ensures fast, accurate defect recognition to resolve systematic issues and maximize yield
Non-destructive technology for three-dimensional insights into solder bumps within minutes
Repeatable results through reliable and accurate technology, designed to support a stable inspection routine
Dose Manager for the protection of X-ray sensitive components
Faster time-to-market, faster time-to-volume, high yield production
By combining high-resolution 3D X-ray capabilities with AI-driven automated defect recognition (ADR) for solder bumps, the CA20 helps to detect systematic challenges faster than ever before. Now available as a fully-automated solution, it seamlessly integrates into the Fab’s material and information flows to deliver actionable real-time metrology data for assuring product quality and maximizing yield.
Speed up your process development with 3D X-ray
While inspections using destructive methods can take weeks, 3D X-ray gives your R&D engineers results they can work with right away. As a non-destructive testing (NDT) system, the CA20 supplies you with crystal-clear 3-dimensional images of nano details inside your ICs within minutes. Monitor your interconnects process, find flaws fast and feed your insights back into the process.
Identification of critical Advanced Packaging defects
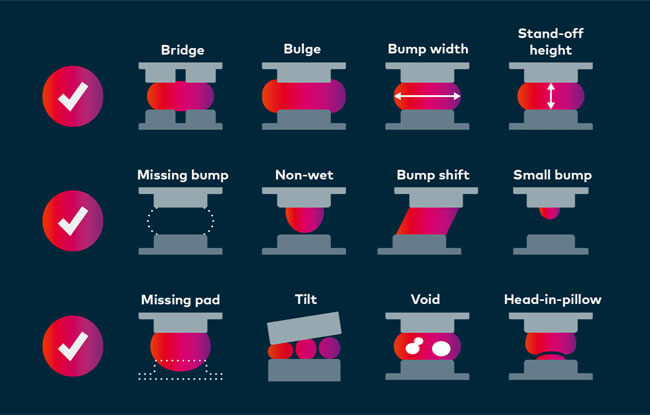
3D X-ray produces high-resolution 3D volumes that allow manufacturers to measure and inspect bumps and identify smallest defects in record time. See critical defects such as non-wet, head-in-pillow or bump shift and determine the stand-off height to monitor die tilt or warping like never before.
From lab to fab.
Whether you need the highest quality images to inspect your parts in a Lab/R&D environment, or you require a fully-automated solution that easily fits into your existing production process, the CA20 is available in a variety of configurations to suit your needs.
Find out more via the links below, or explore the full suite of features.
Small batch inspection & failure analysis.
While inspections using destructive methods can take weeks, 3D X-ray gives your R&D engineers results they can work with right away. Quickly ramp-up your interconnects process and find flaws fast with feedback gained from 3D images within minutes.
Fully-automated inspection.
Our smart 3D X-ray inspection solution - for the fab. With a fully automatic loader and assisted defect recognition software, the CA20 is designed to complement your production line with consistent, fast and accurate 3D X-ray inspection. Monitor your interconnects process, recognize flaws fast and feed your insights back into the process.
Software Solutions
From software tools that rapidly detect and analyze the size and severity of defects, such as voids, solder bump misalignments, and head-in-pillow issues, to solutions that ensure delicate components remain shielded from harmful X-rays, the CA20 is equipped with a range of advanced software solutions across our three pillars of Clarity, Efficiency and Insights. Explore just a few of these below.
The CoS 3D Clarity package as part of our award-winning Geminy software is your tool to quickly create high resolution 3D images.
Use our Batch Manager to inspect trays of ICs or substrate strips with a few clicks.
Protect your sensitive inspection parts from critical X-ray doses with the Dose Manager.
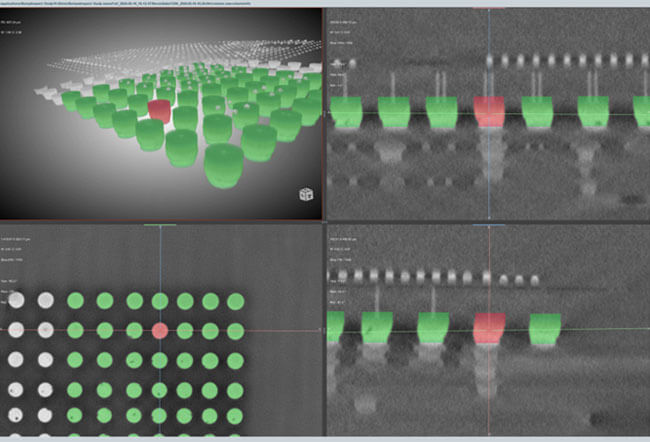
1. Clarity Image acquisition
Gain highest image data quality: See more details of your inspection samples by capturing brilliant 2D and 3D images.

CoS 3D Clarity
The CoS 3D Clarity package is tailor-made for Advanced Packaging inspections with the CA20 system. Due to the precise manipulation of the CA20, its dedicated semi X-ray imaging chain and the powerful 3D volume reconstruction software, it allows for revolutionary resolution.
2. Efficency - Connectivity & management
Increase your productivity: Streamline workflows between systems, software and people through seamless connectivity and automation.

Dose Manager
Dose Manager continuously monitors and tracks the X-ray dose that the sample is subjected to, taking into account the tube power and the distance to the sample. To avoid damage to sensitive components such as flash and DRAM memories, it switches off the X-ray automatically once the dosage limit is reached.
Batch Manager
Inspect multiple parts faster with our multi-part holders and batch manager, and inspect trays of ICs or substrate strips with just a few clicks.
3. Insights - Image analysis & process control
Improve product and process quality: Extract critical information from image data to stay ahead of your market.

CoS Insights (Powered by Dragonfly)
Increased productivity through 3D metrology of Chip-on Substrate solder connections:
Speed up process development and failure analysis with fast, valuable insights and CoS 3D Clarity scans for bumps down to 50 µm.
Ensure quality and control by learning crucial parameters, detecting defects like Head-in-Pillow, and obtaining objective, reproducible results.
Efficient setup for single parts and small batches, with automated sequence programming and tools for comprehensive 2D and 3D inspections.
Results available in both PDF and machine-readable forms
CoS Insights X 3D*
CoS Insights X 3D is our specialised software for the CA20 equipped with a fully-automated inspection package, including EFEM loader for IC trays from magazine. It provides fast, sufficient quality 3D image acquisition, and fully automated 3D bump metrology and defect recognition including reporting for automated processing.
Speed up time to market and time to volume with real-time feedback, and ship zero defects by identifying developing trends early
Improve yield by process control based on accurate and reliable automated 3D metrology information and increase productivity due to fully automated 24/7 inspections
Extracted information is also available in machine readable form for post reporting jobs, e.g. json, xml and direct access reports can be automatically transferred to your preferred local storage location
*CoS Insights X 3D is available in combination with our automatic loader
Dragonfly 3D World
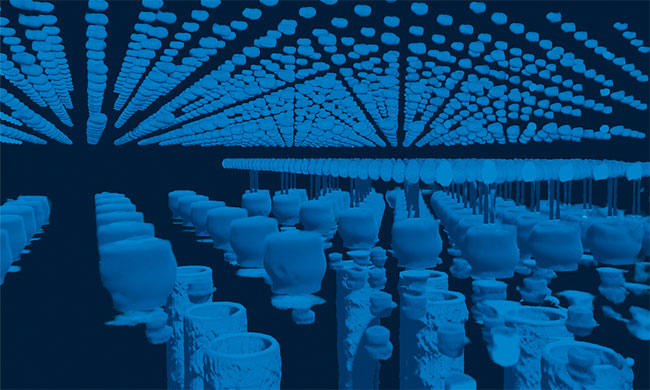
Analyze your 3D X-ray data with this intuitive image processing software suite. Utilize the power of AI and use the deep learning segmentation to extract the maximum of information from the low dose scan that protects your sensitive parts. If you do not need the numbers, simply highlight your results with stunning visuals.
CA20 inspection applications in R&D and production
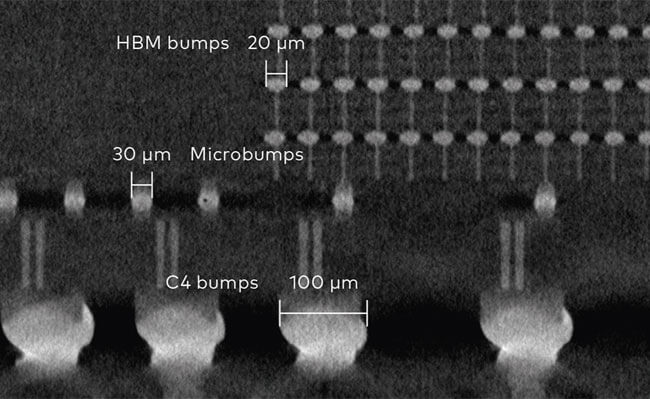
Chip-on-Substrate including Fan Out packaging solder connections (C4 bumps and copper pillars)
2.5 and 3D IC package solder connections including microbumps
Substrate strip solder bumps
Sensors
MEMS and MOEMS
Technical Data
| Application/Version | MXI / Lab | AXI / Fab |
| Max. inspection envelope | 435 mm (17") | 435 mm (17") |
| System Dimensions (W/D/H) | 1650 x 1400 x 2050 mm | 1955 x 3100 x 2200 mm* |
| System Weight | ~ 2350 kg | ~ 3650 kg |
| Detector Active Area | 130 x 130 mm | 130 x 130 mm |
| Pixel Matrix | 1536 x 1536 px | 1536 x 1536 px |
| Pixel Pitch | 85 µm | 85 µm |
| Oblique Viewing | +/- 65° (130°) | +/- 65° (130°) |
| Max. part weight | 1 - 2 kg** | 0.5 kg*** |
| Scan Modes | 2D, 2.5D, 3D | 2D, 2.5D, 3D |


 Jacky
Jacky Jacky
Jacky